
Note: Adding and editing users only available to users with 'Org Lead Admin' Permissions.

Adding a Single User
Bulk Adding/Editing User
Adding a Single User
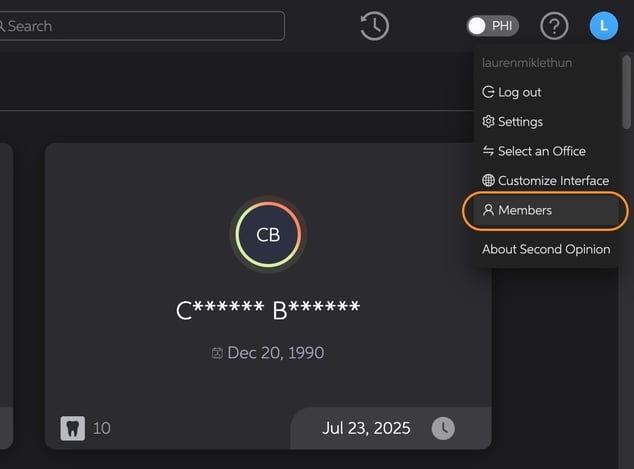
1. Navigate to Member Settings
From within your Pearl platform, go to Members in the settings.
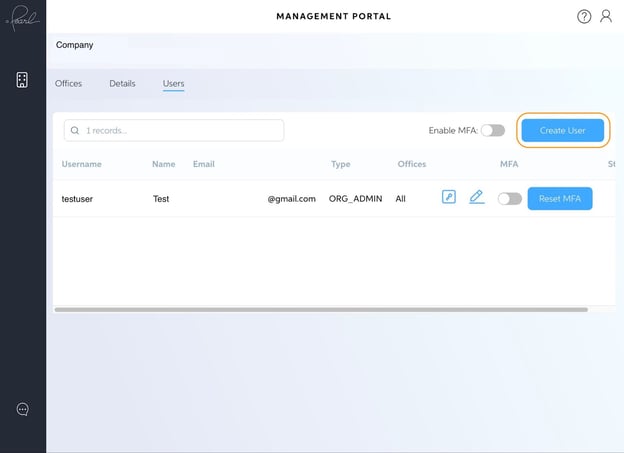
2. Click Create User
Note: Creating a user only available to users with Org Lead Admin permissions.
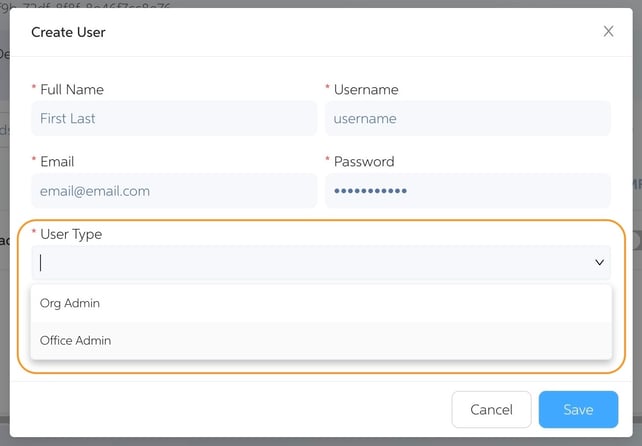
3. Fill Out the Form
Complete all required fields to set up the new user account.

4. Select the User Type
Choose one:
- Org Admin – Access to all offices in your organization
- Office Admin – Access limited to specified office(s)
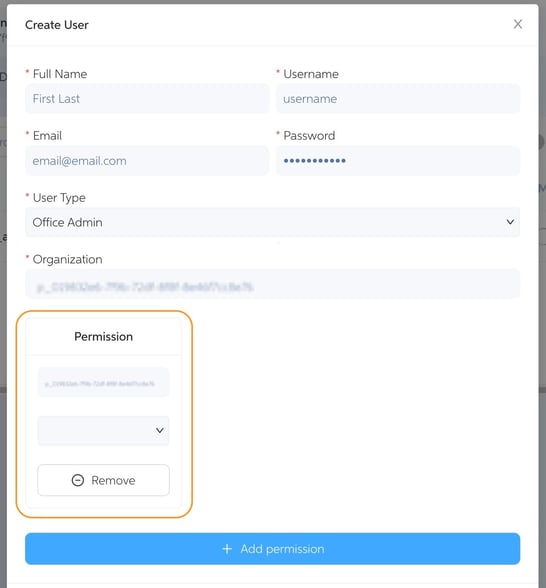
5. Assign Permissions (Office Admin Only)
- Click Add Permission

- Select which office(s) the user should be able to manage
6. Click Save
Finalize the setup by clicking the Save button.
7. Your newly created user can now be used to login to Pearl
Bulking Adding/Editing User
1. Navigate to Member Settings
From within your Pearl platform, go to Members in the settings.
2. Select Bulk Edit

3. Download User Data

- Click Download All Data
- A spreadsheet will download containing:
- All existing users
- All supported user fields

Important Notes:
- Existing passwords will appear as HIDDEN
- All rows represent current user records
4. Create or Update Users in the Spreadsheet
Creating New Users
- Add a new row to the spreadsheet
- Fill in the required user fields
Updating Existing Users
- Edit values directly in the existing user row
- Changes will overwrite the current data
Clearing Field Values
- To remove an existing value, type CLEAR in the field
- Leaving a field blank will not remove data
Password Handling
- Exported passwords display as HIDDEN
- Overwrite HIDDEN with a new value to reset a password
User Type
- Office Admin – Access limited to specified office(s)
- Org Admin - Access to all office in your organization
Office Assignments
- For users assigned to multiple offices:
- Enter office names comma-separated in the offices column
- Supported keywords:
- None – removes all office assignments
- All - assigns user to all offices
5. Upload the Spreadsheet
- Save your completed spreadsheet
Upload it back into the Bulk Edit modal

6. Review Validation Results
- Each row is validated independently
Validation Outcomes:
- ✅ Valid rows: Users are created or updated successfully

- ❌ Invalid rows: Returned with clear, actionable error messages
If errors occur:
- Review the error message(s)
- Correct the spreadsheet
- Re-upload the file for re-validation
7. Finalize Changes
- Once validation is complete, click Done

- The Users page will reflect all successful updates
