
Templates belong to a provider profile. Select your profile in the profile menu before editing templates, otherwise you'll see "Failed to save template, no doctor profile selected".
Customize an Existing Template
Customizing an Existing Template
If you want to edit a pre-built template and adjust it for your team, use these steps:
Step 1: Open the Note Templates Section
Go to Pearl Voice and select Note Templates from your user profile. Browse organized templates by category.
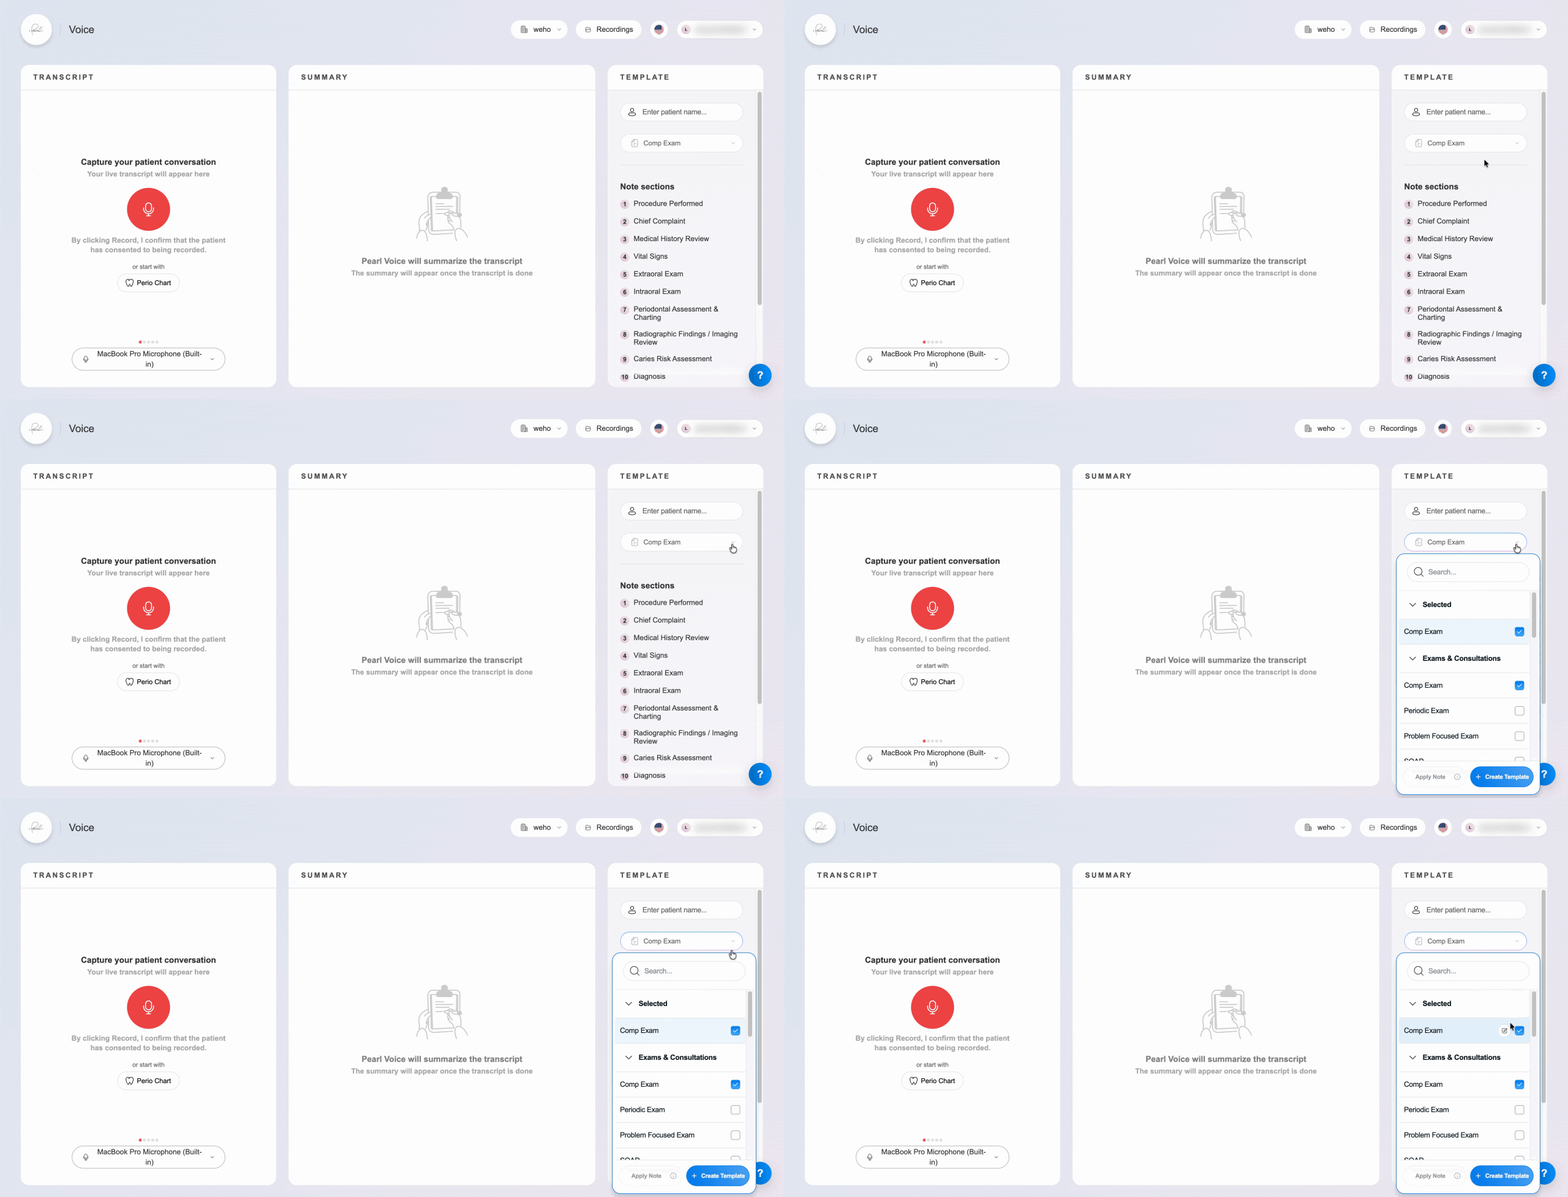
Step 2: Edit an Existing Template
Hover over a template and click the Edit icon to open the template editor.
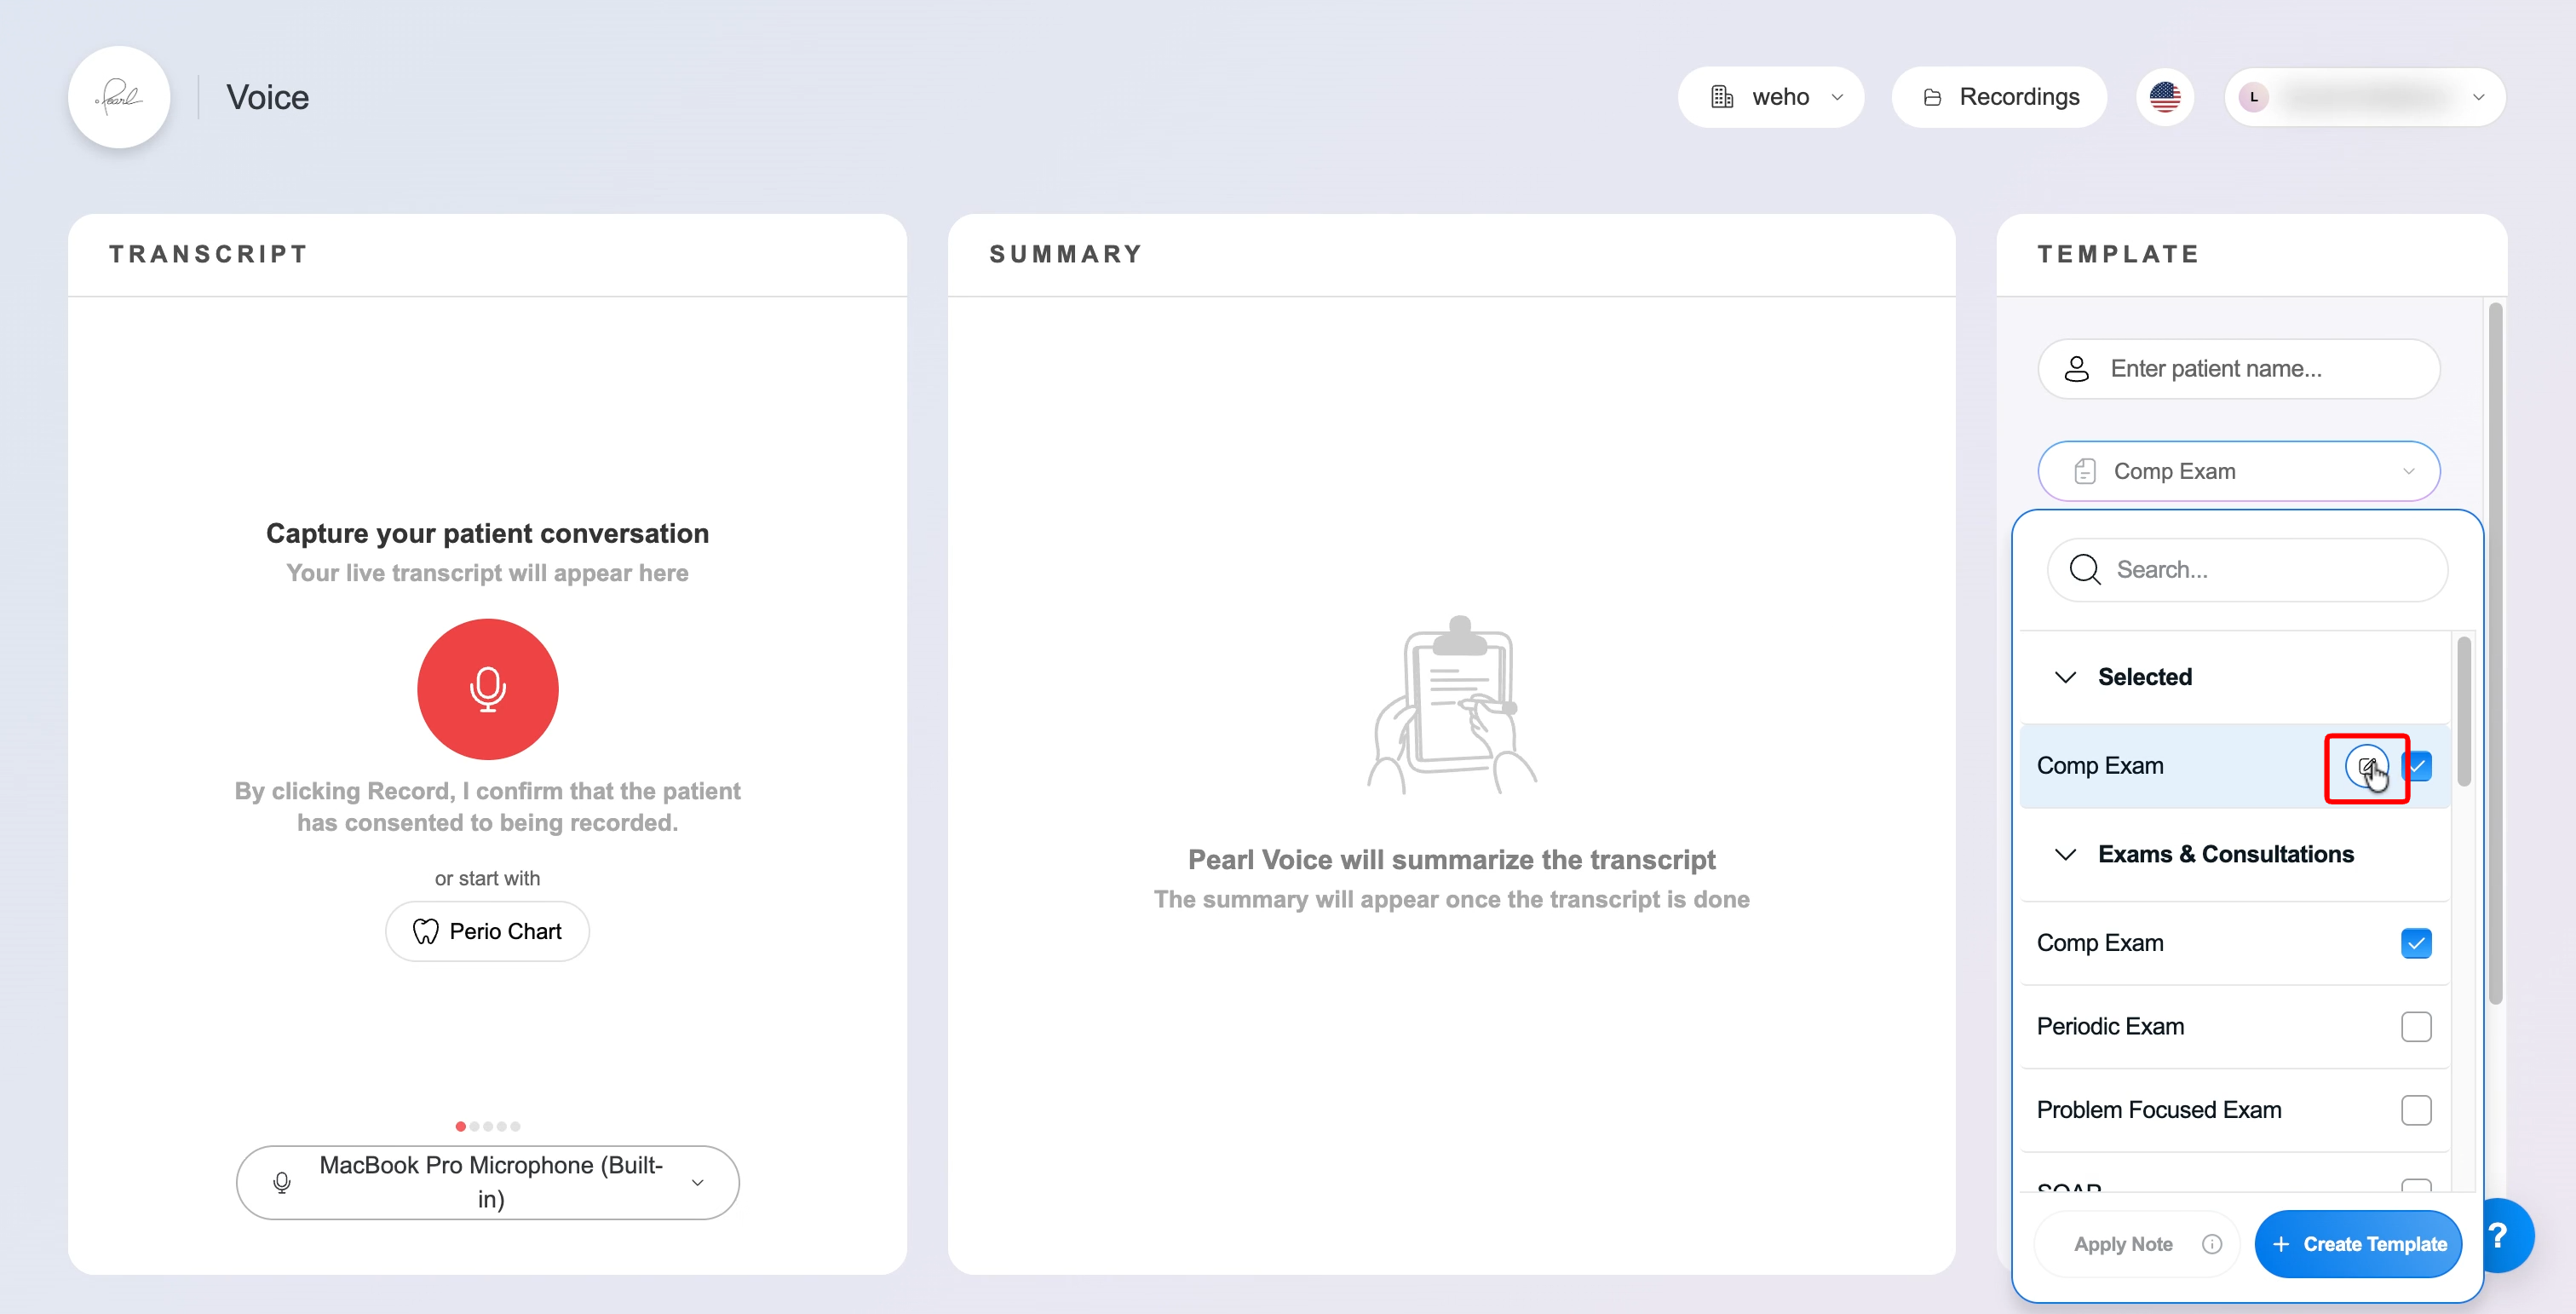
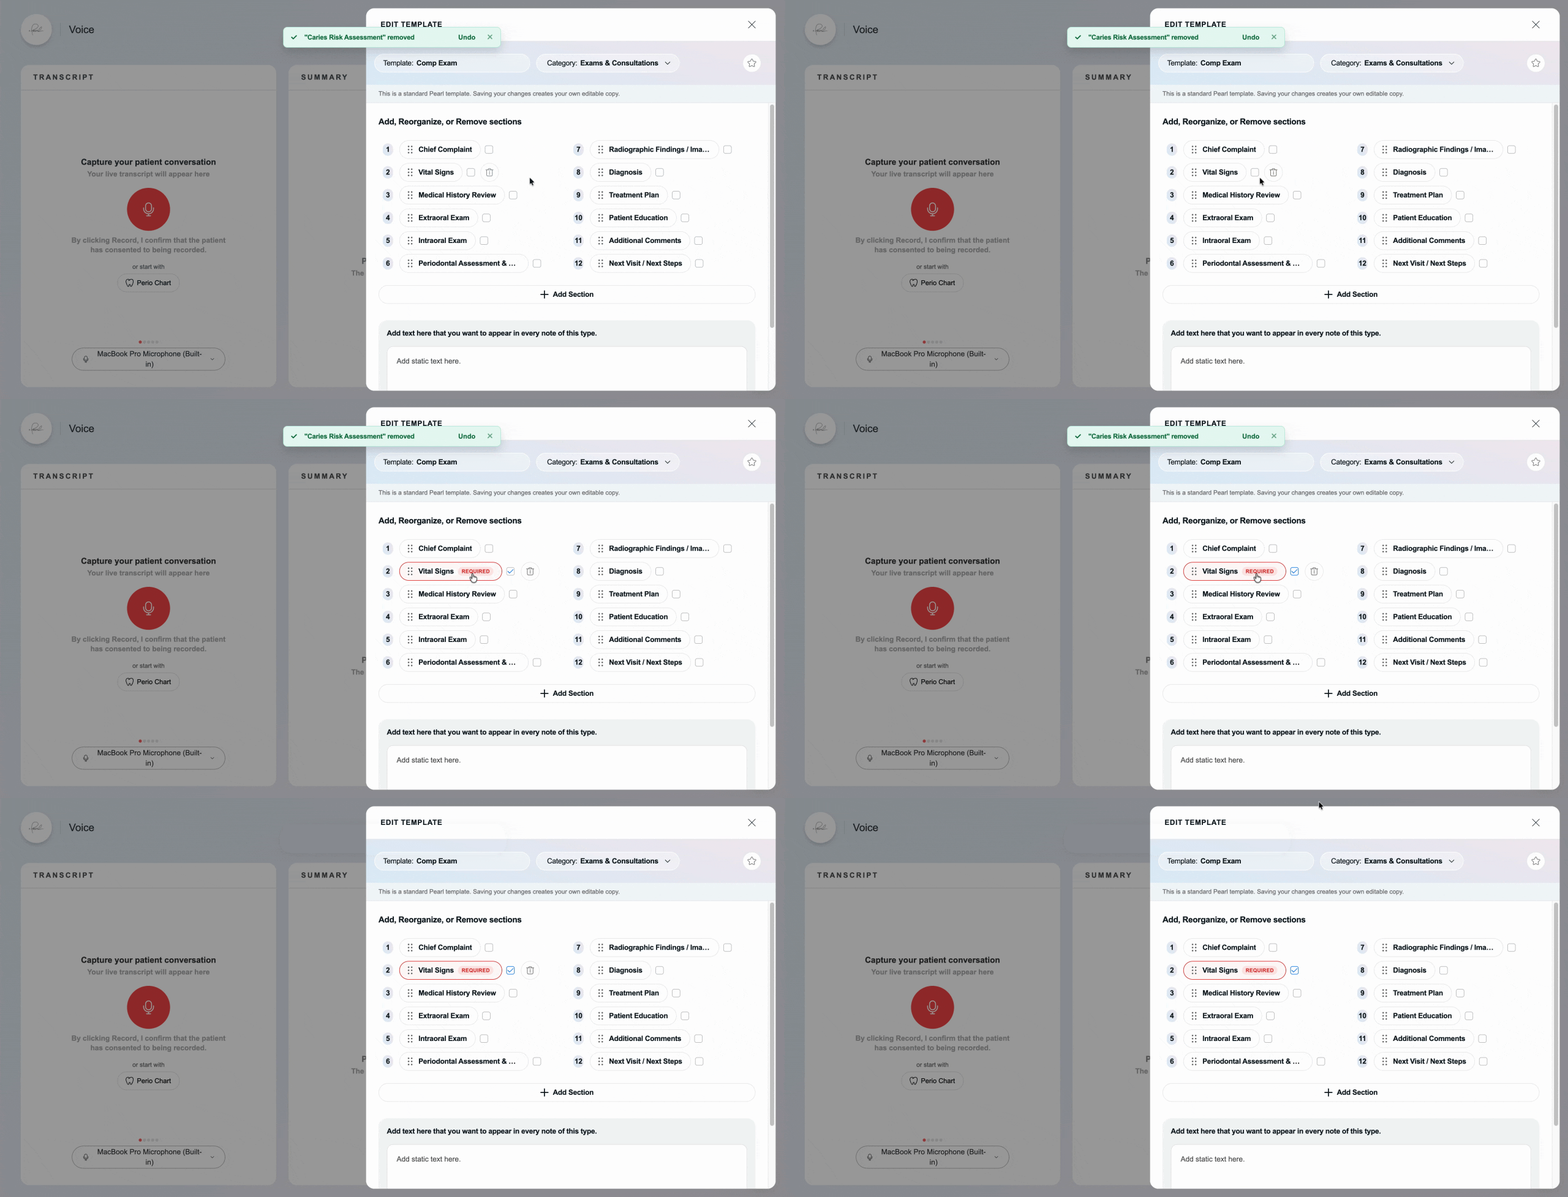
Step 3: Reorder Template Sections
Drag and drop sections into the order that matches your workflow.
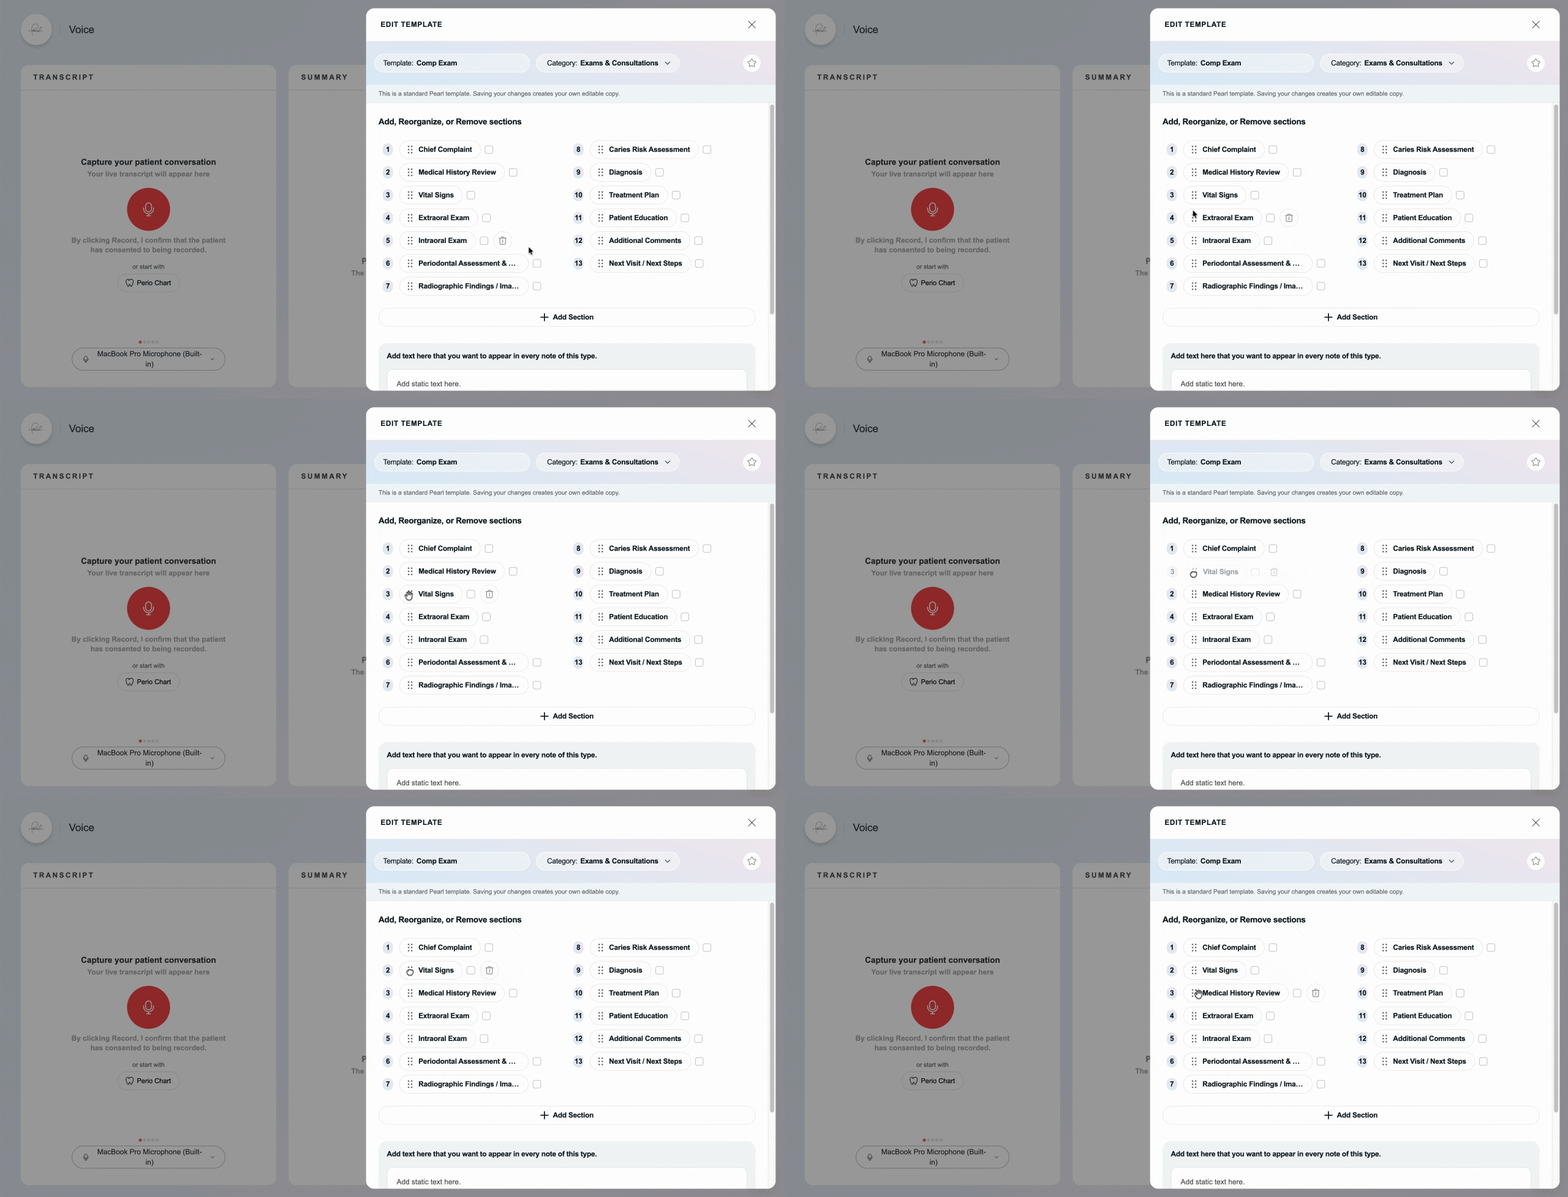
Step 4: Remove Unnecessary Sections
Delete any sections you don't need by clicking Delete next to that section.
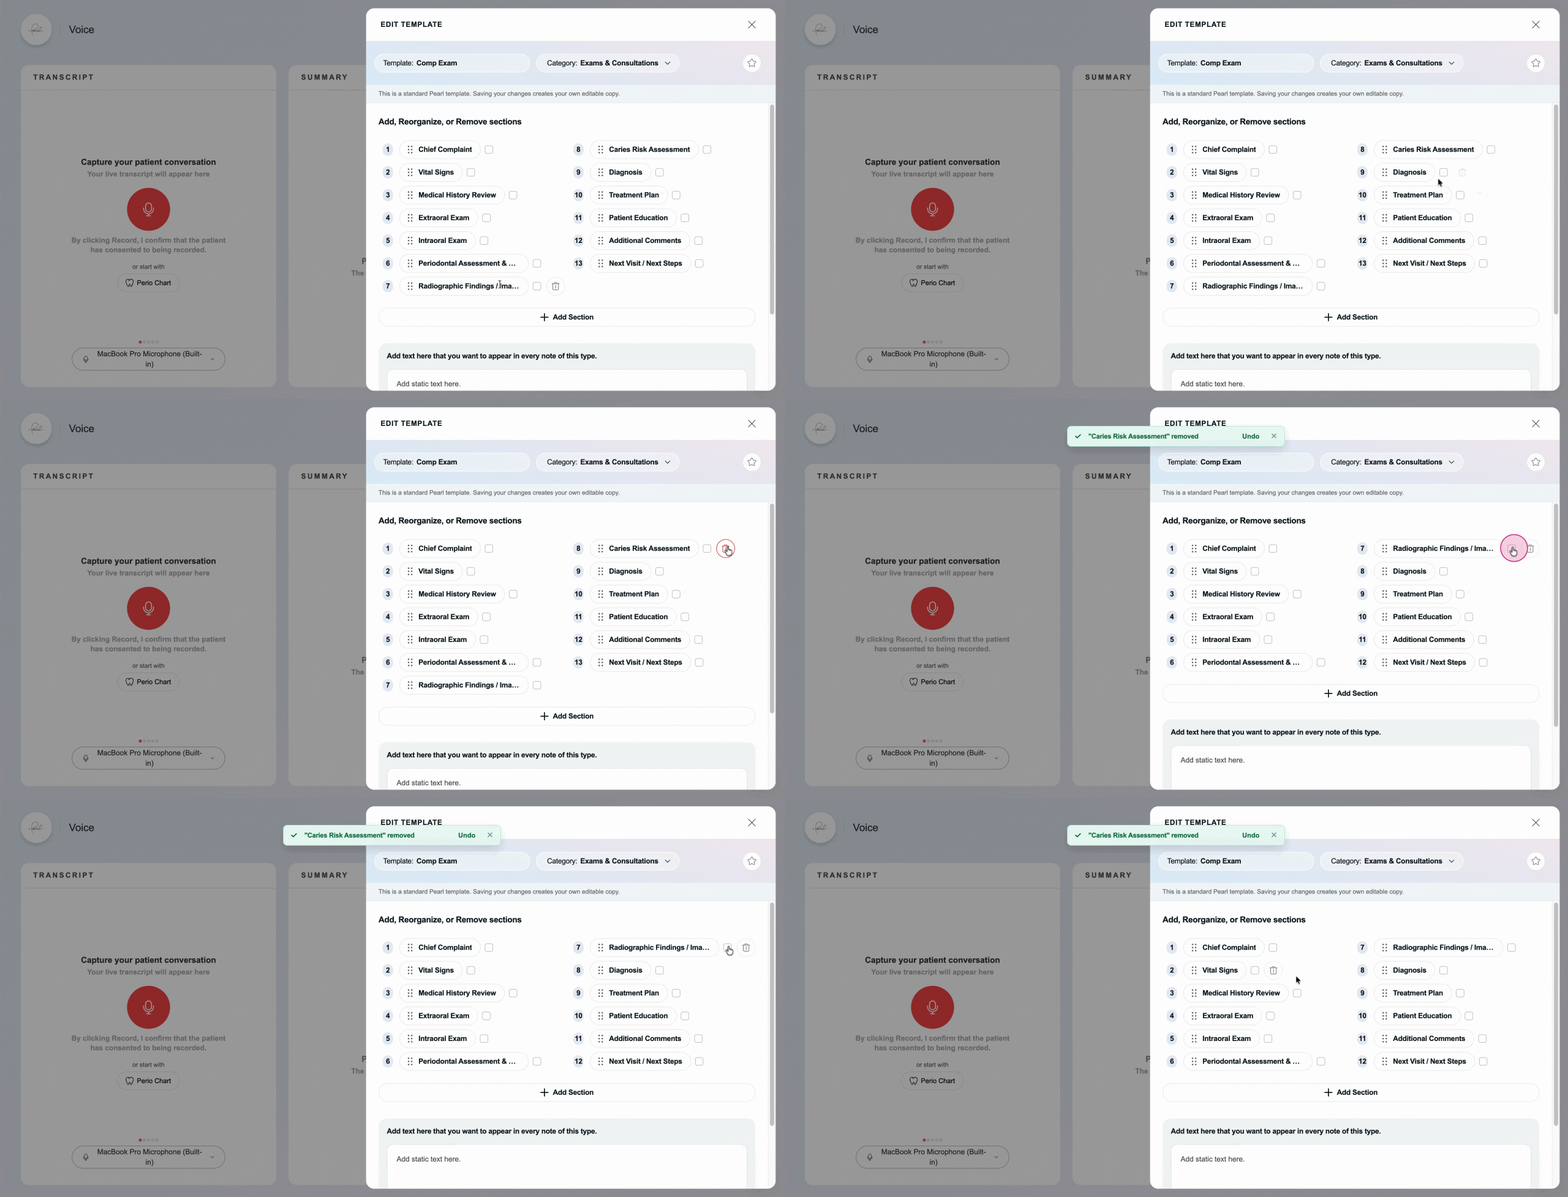
Step 5: Make Sections Mandatory
Turn on the mandatory toggle for fields that must be filled before saving. Pearl Voice will highlight empty mandatory fields for easy review.
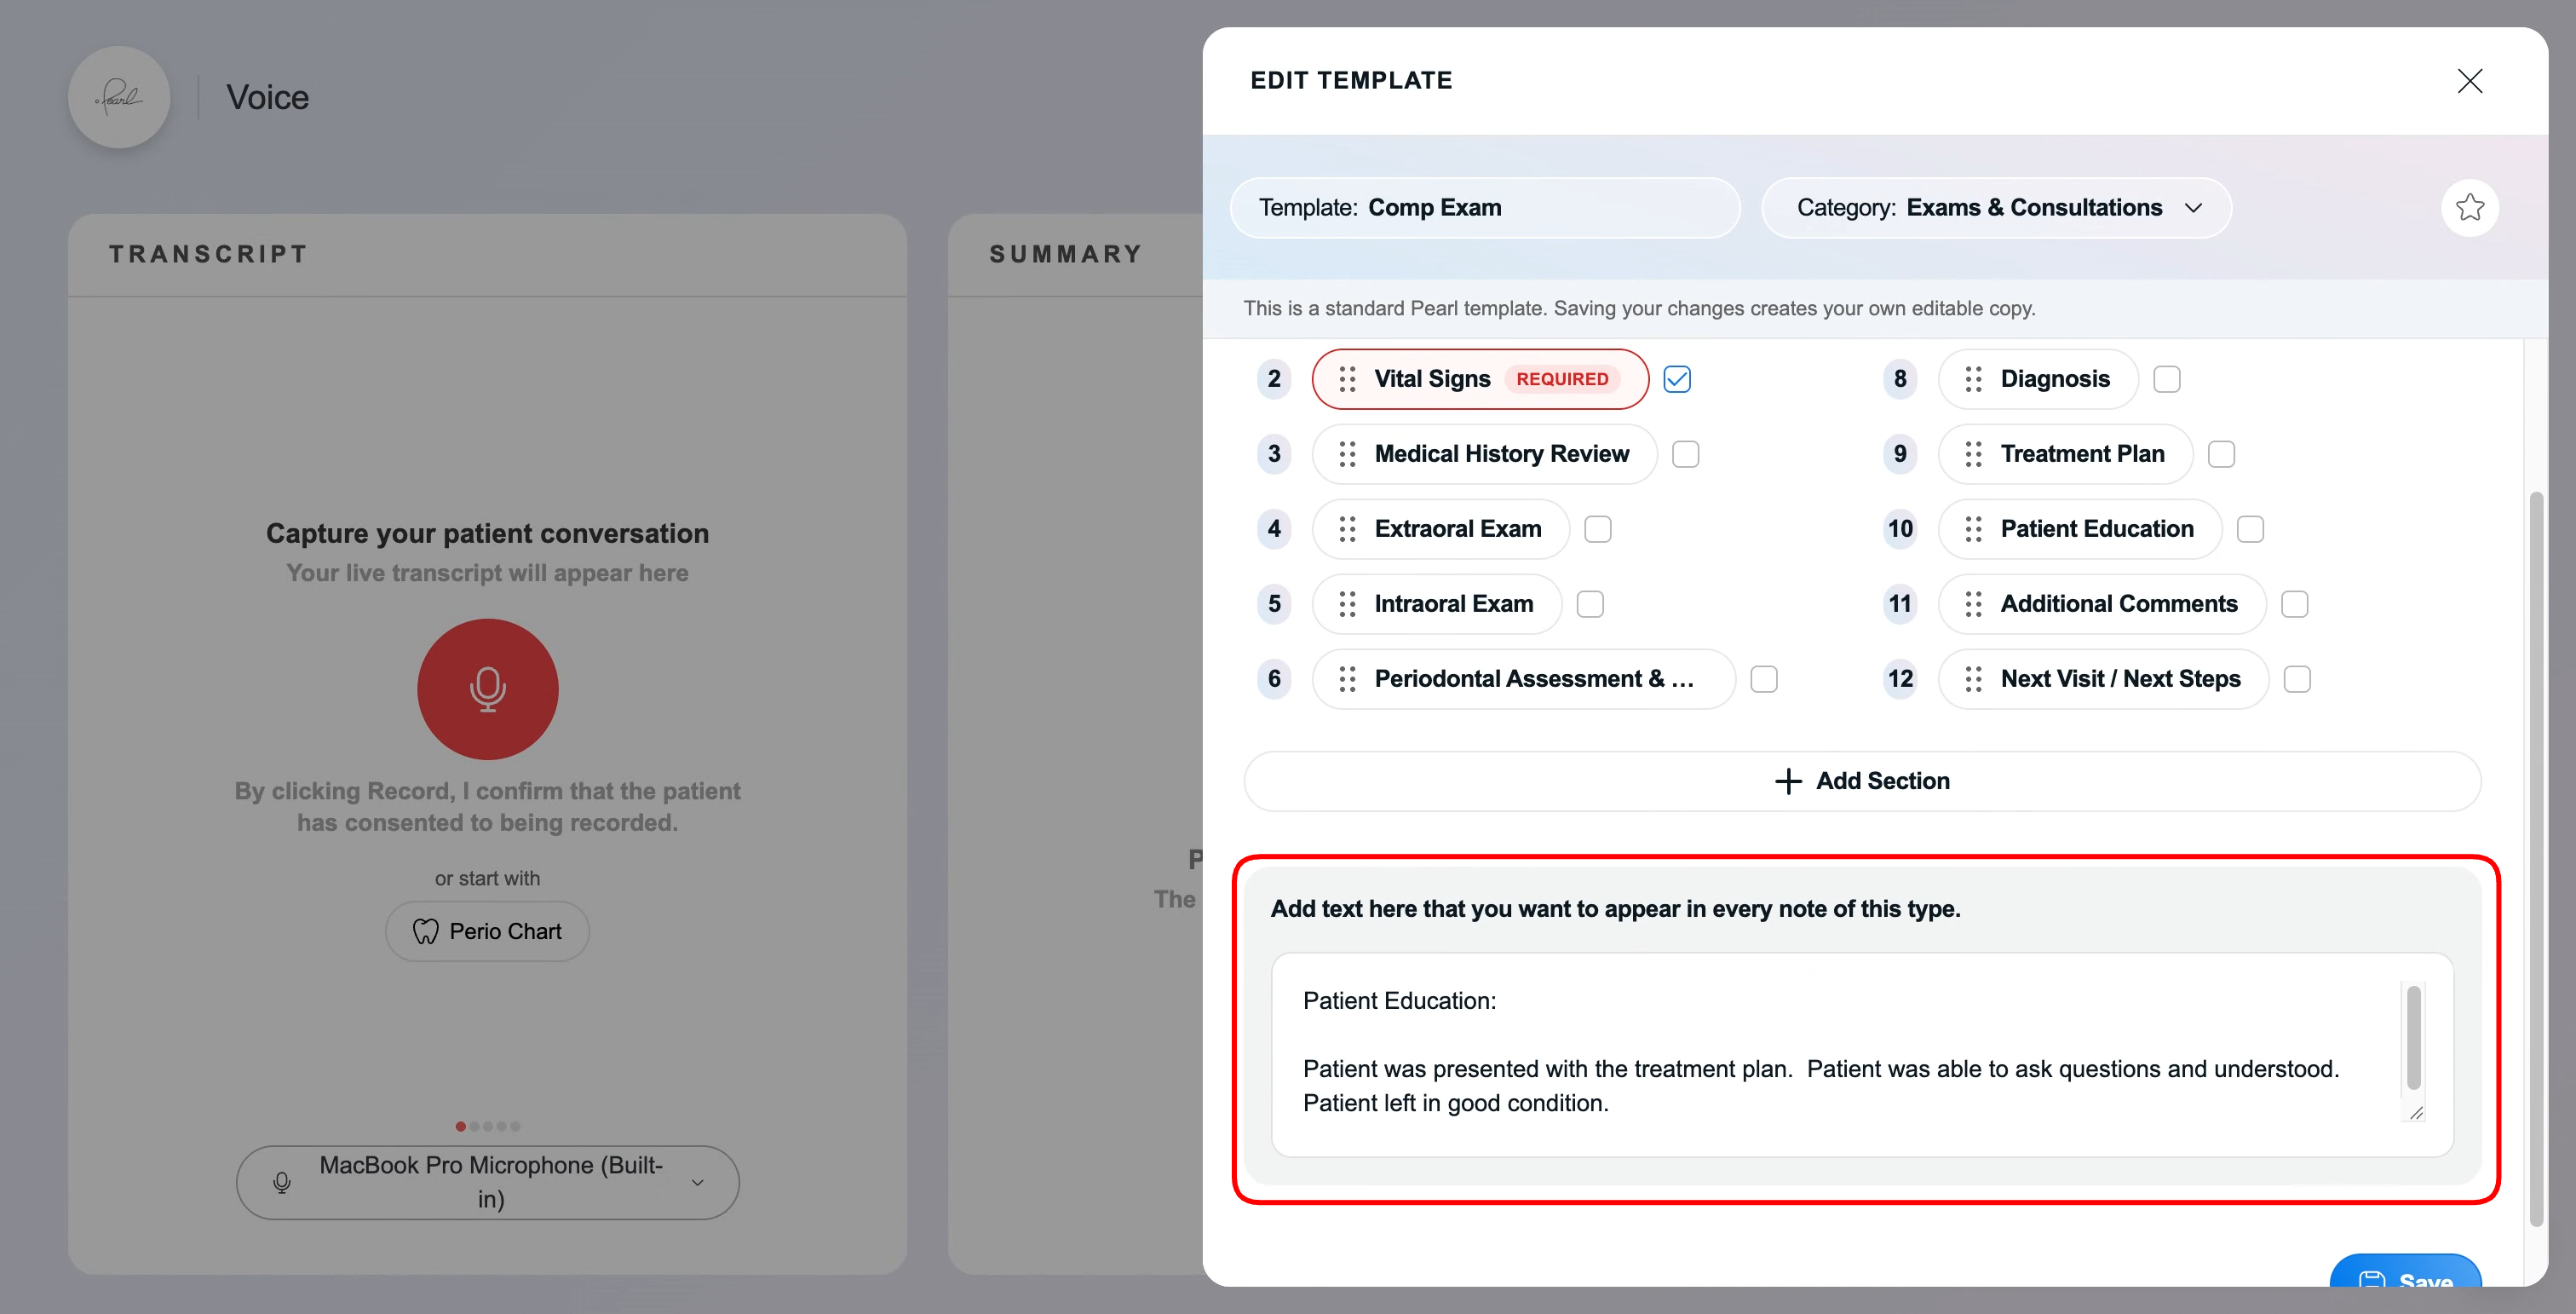
Step 6: Add Static Text
At the bottom, add recurring “static text.” This appears in every note using the template—useful for standard phrases or procedures. Any dictated information will override static text for that field.
Include:
- Your preferred anesthetics
- The materials you use (bonding agent, composite brand, cement type, etc.)
- Standard procedural steps in the order you perform them
- Routine clinical language your notes always include (e.g., "negative aspiration," "ensured clean margins")
- Default post-op instructions you give for this procedure
Do not include:
- Blank fields or form-style placeholders (e.g., "CC: ___" or "Tooth #: ___")
- Patient-specific details like tooth numbers, measurements, or diagnoses — these come from the live recording
- Procedure details that vary case-by-case
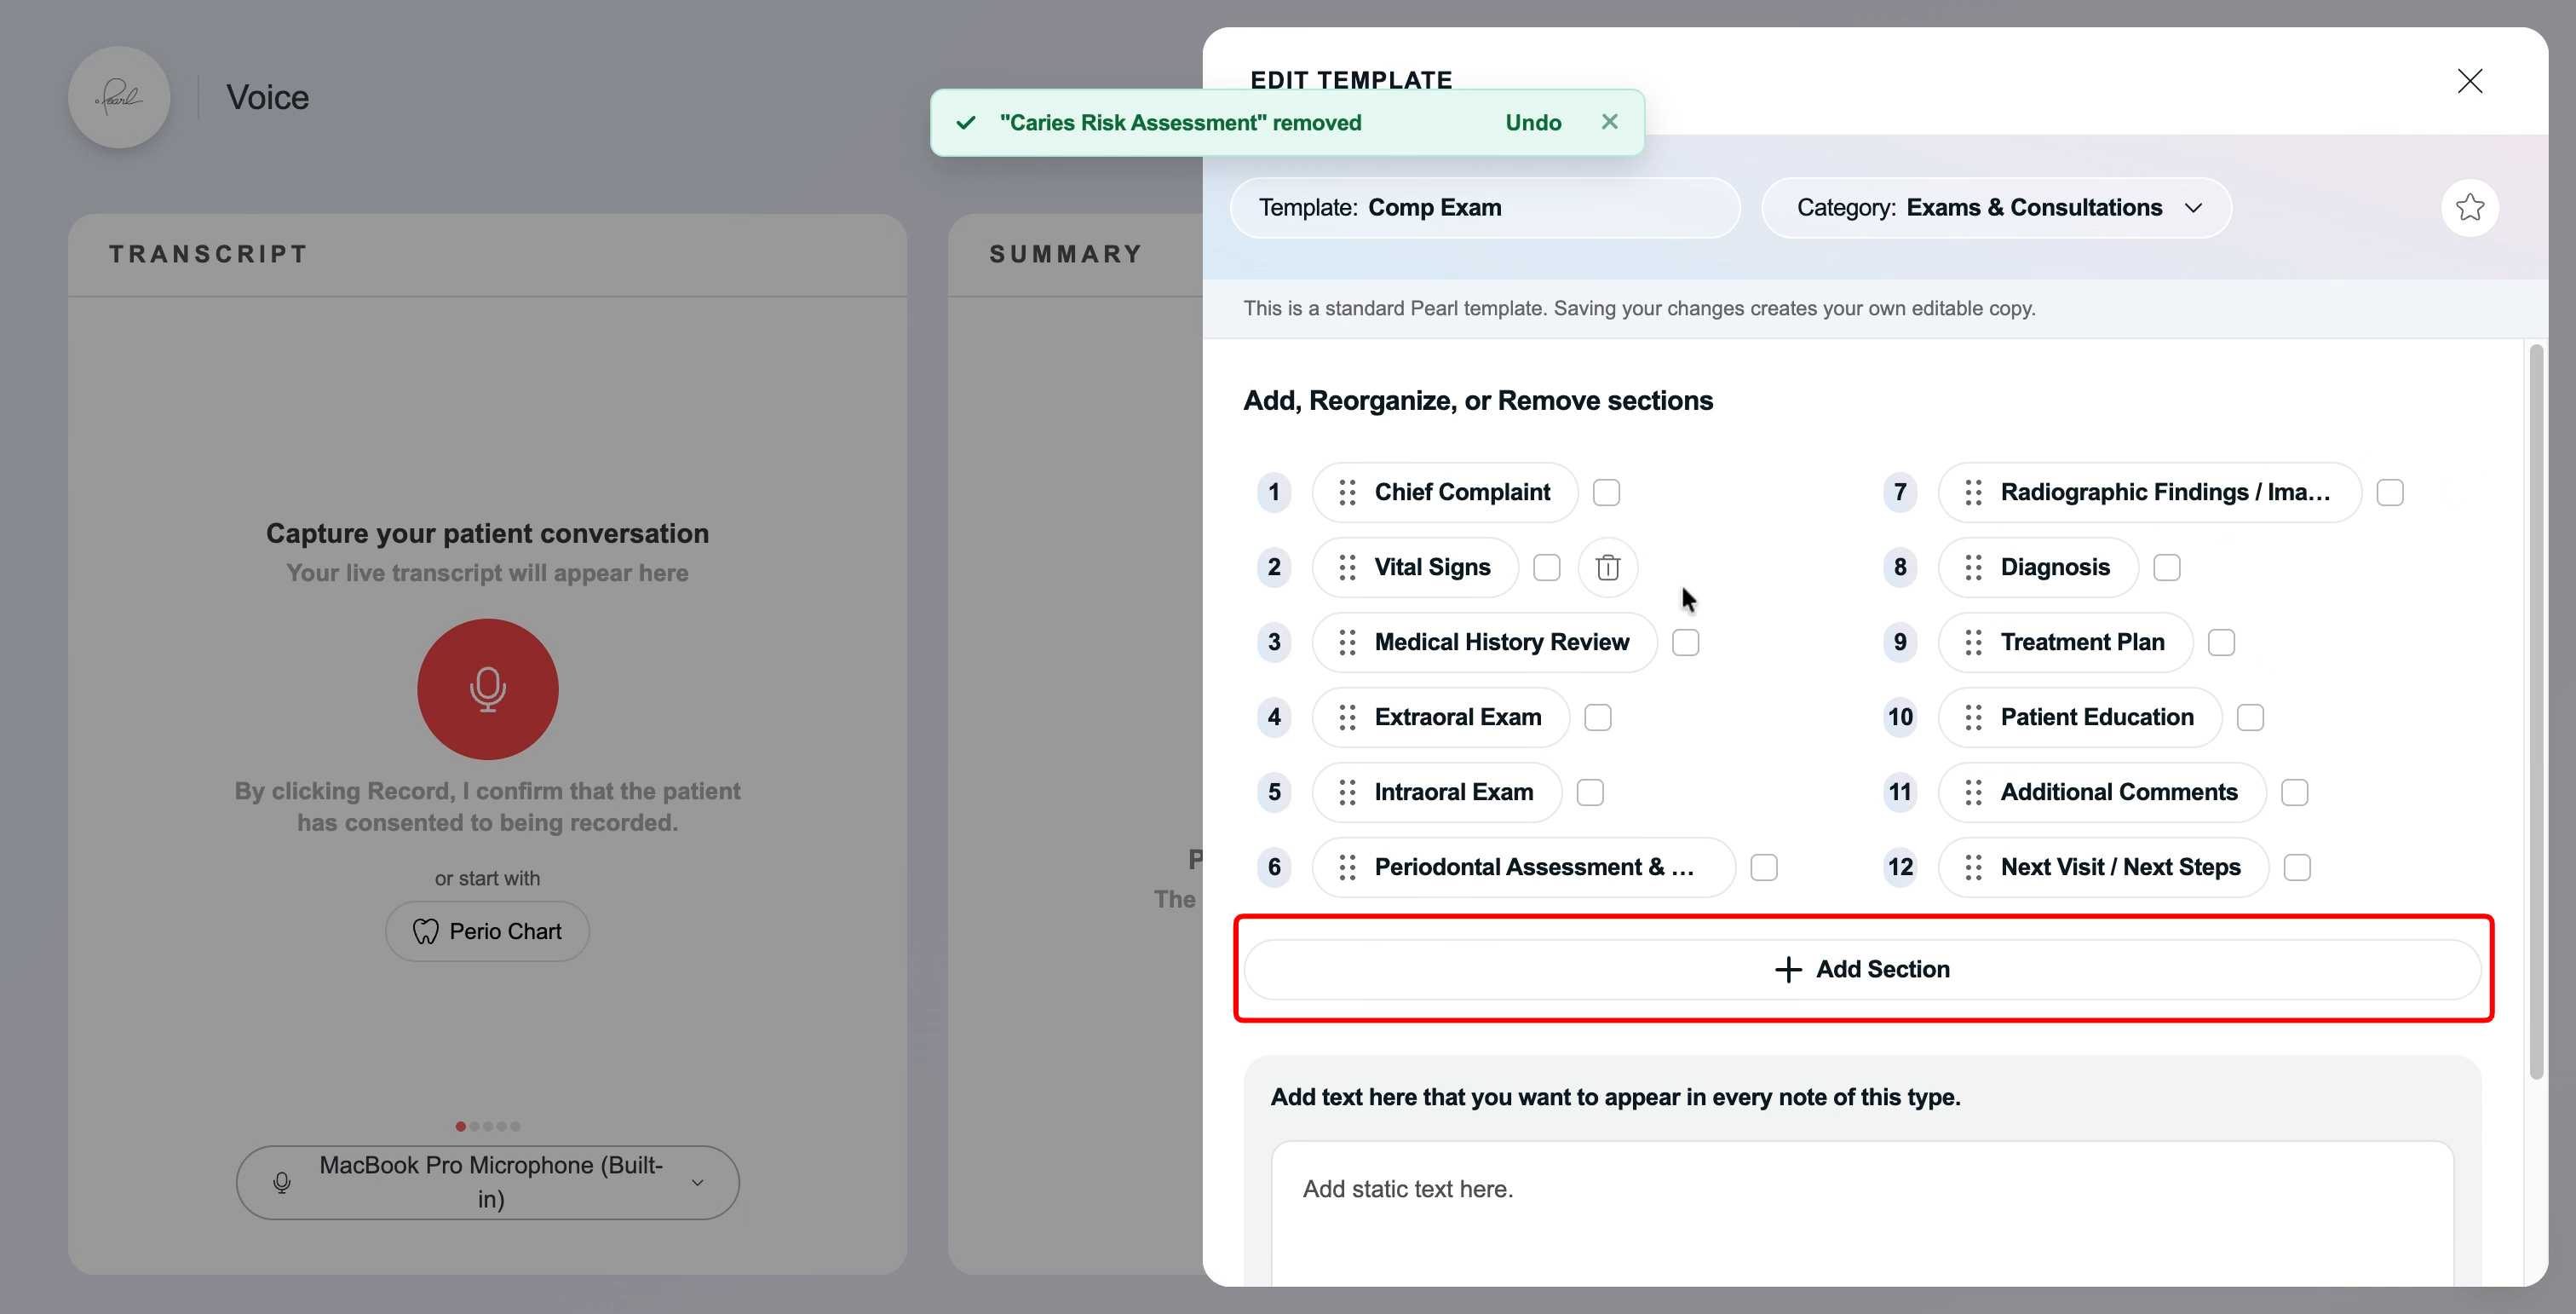
Step 7: Add New Sections
Click Add Section to access the section bank. Search or browse for extra sections, like occlusal exam or soft tissue profile, to include in your template.
Step 8: Save Your Changes
When you’re finished editing, click Save. The updated template is ready for all future documentation—and you can edit it anytime.
Creating a New Template
If you need a template that doesn’t exist yet, build your own from scratch with these steps:
Step 1: Open the Note Templates Section
Head to Note Templates from your profile menu.
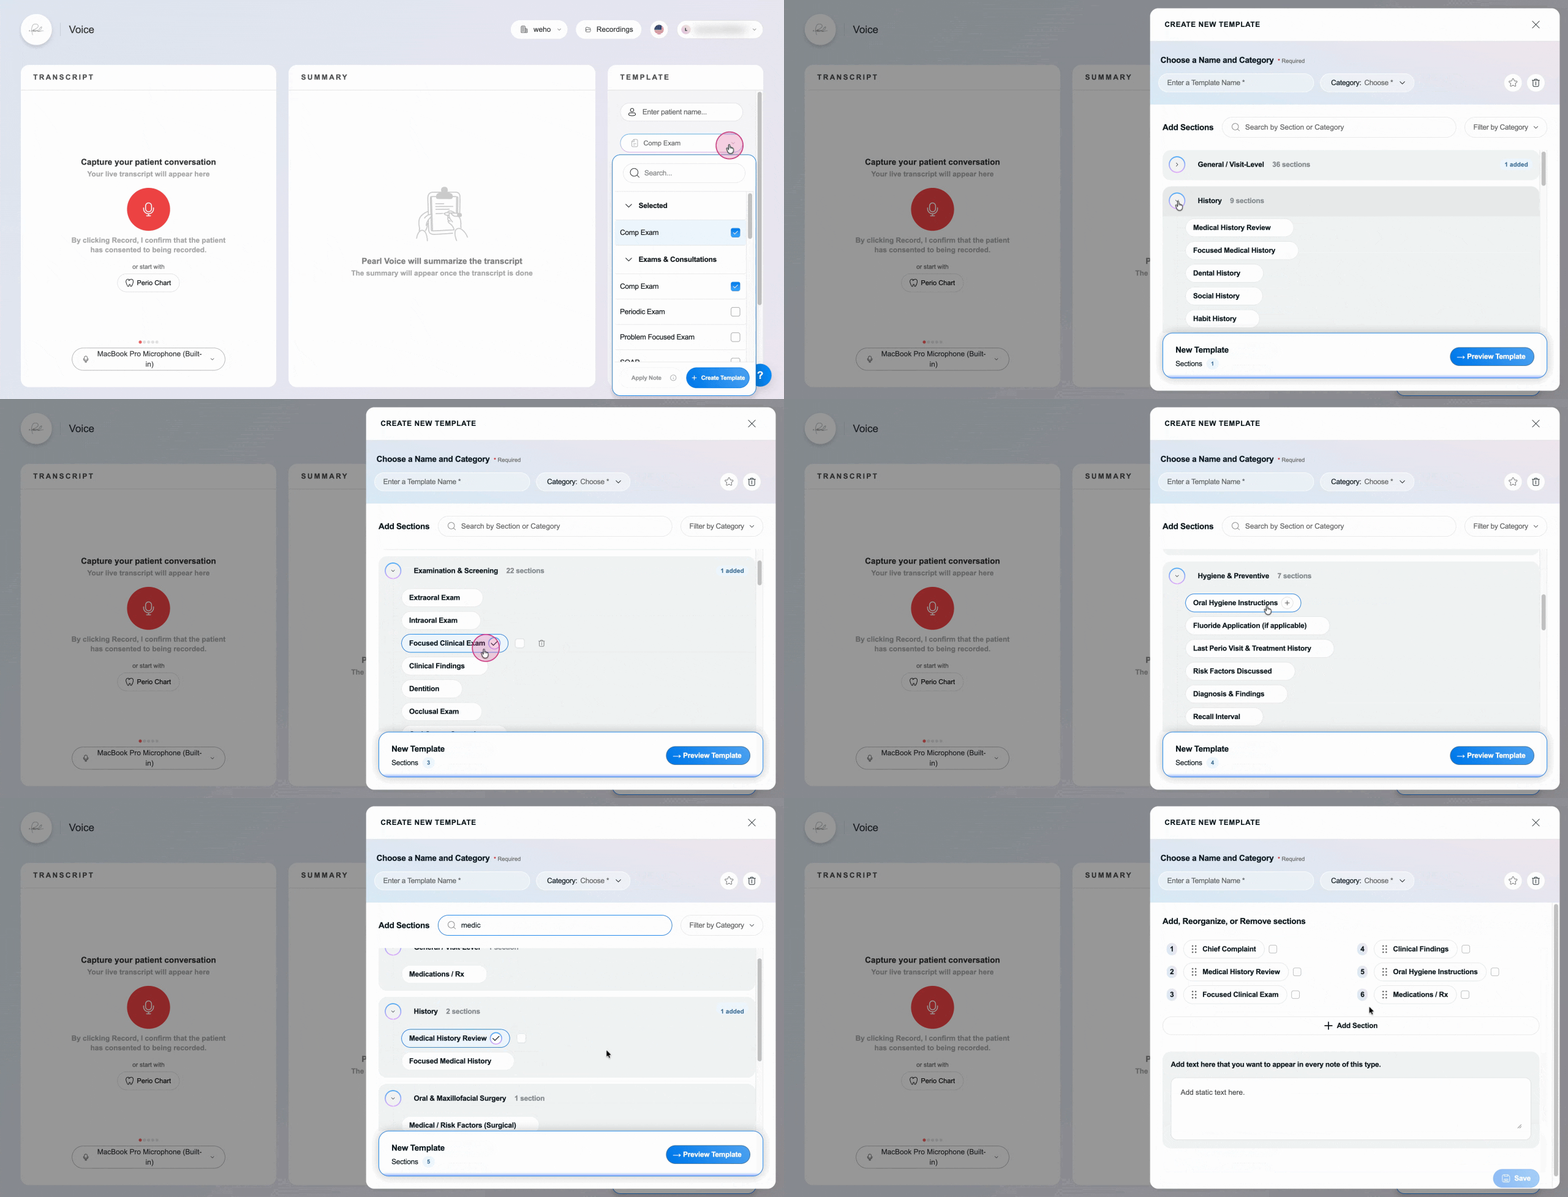
Step 2: Start a New Template
Select Create Template from the dropdown menu. Enter a name and select a category for your new template.
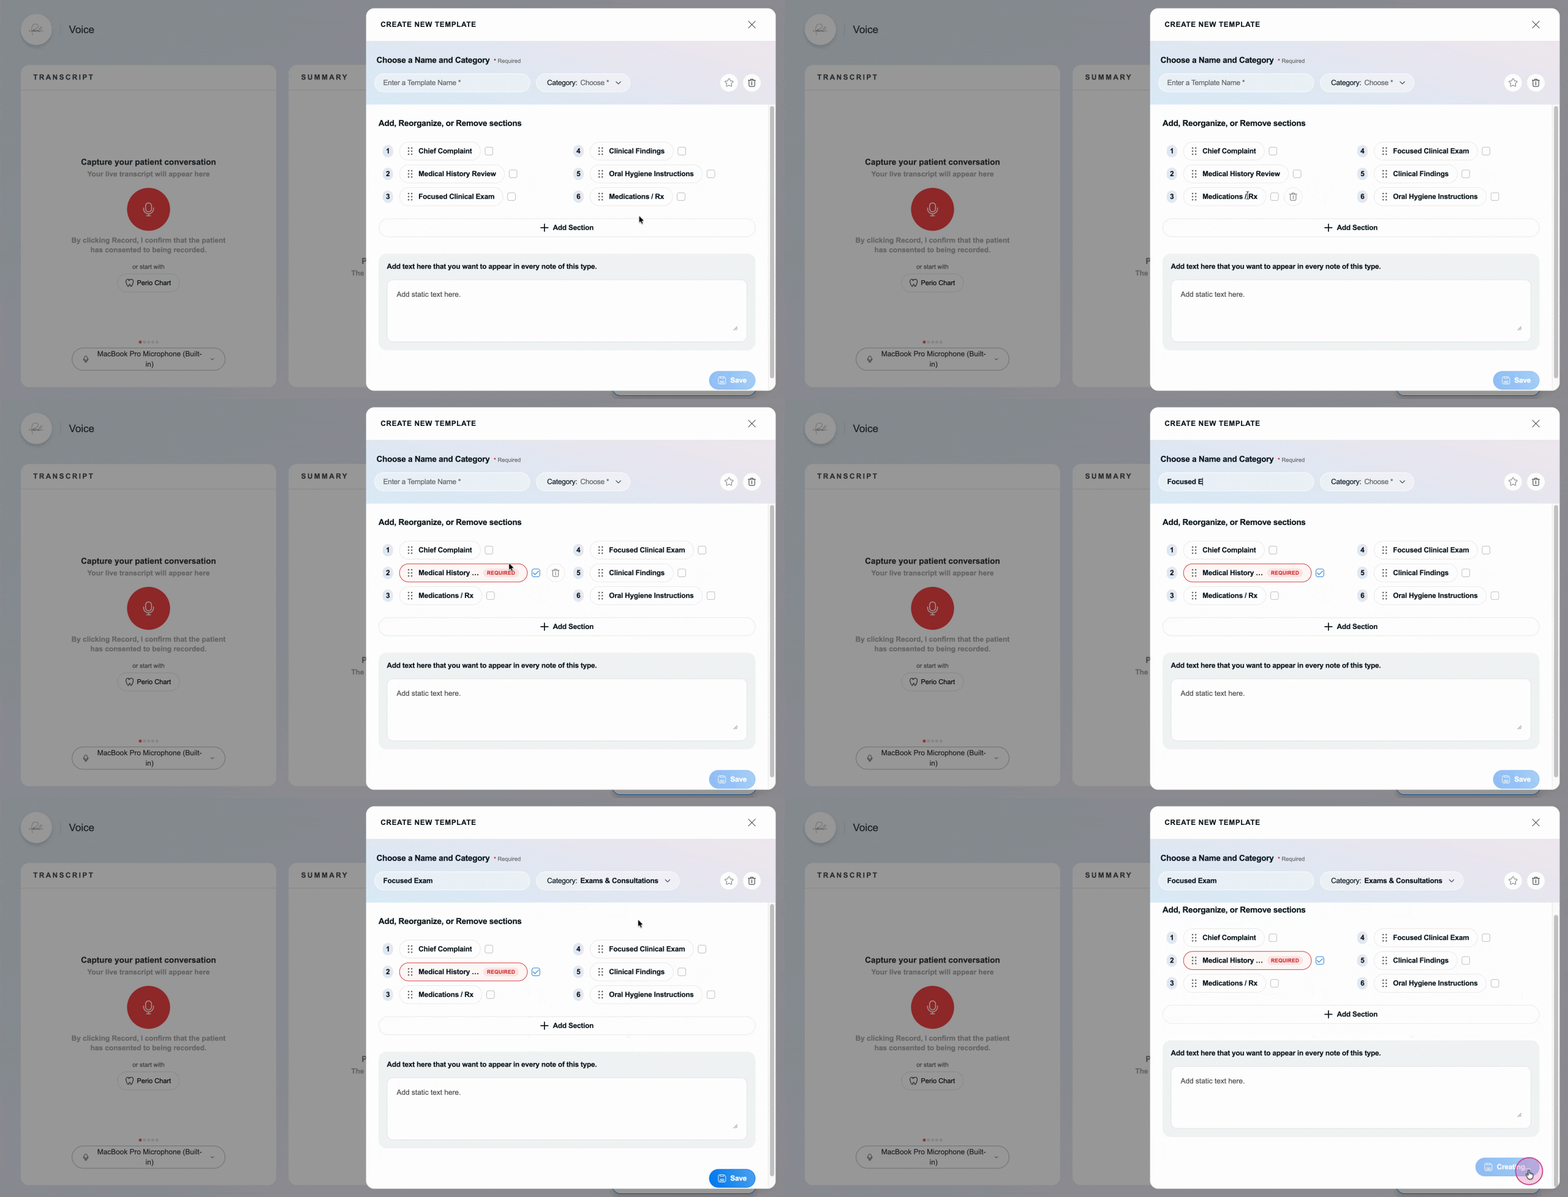
Step 3: Add, Modify, and Organize Sections
Add sections from the section bank, rearrange them by dragging, and set any fields as mandatory. Use the editor to add static text just like you would in an existing template.
Step 4: Save Your New Template
Click Save to finish. Your new custom template now appears in your list and can be updated whenever needed.
Custom templates keep every clinical note consistent, fast, and tailored to how your team works best. Whether you’re refining what’s there or building from scratch, Pearl Voice’s templates make precise documentation simple and flexible.